Allergy Sufferers’ Relief

Allergy Sufferers’ Relief


Happy Spring! Its now officially Spring and with Spring comes beautiful flowers, green grass, budding trees, warming sunshine, and hazy rainy days. But, Spring also means hello allergies once again!


Not to be “debby downer” because despite my own allergies I gladly welcome budding plants, green grass, and warmer temps. After all I do live in Chicagoland, where winter hits and it hits hard, so I’ve been ready for Spring since December.


Some may say if you suffer from Spring allergies just stay inside. This is definitely not an option for me as I crave the outdoors. So, in this post I’ll give some basic information about allergies and how I’ve gone about treating mine. Throughout the post I’ll post some beautiful Spring photos to remind you why staying indoors is last resort to managing your allergies.


First thing’s first, what are allergy symptoms?

Allergies symptoms can be quite varied, but here are some basic symptoms:
Runny nose Post nasal drip
Sinus headache (including pressure at the base of the back of the skull and into the upper neck)
Red, itchy eyes Coughing
Sneezing Wheezing/ Shortness of breath
Itchy nose and throat Conjunctivitis
Skin rashes


Second, what are you actually allergic to? When people say they’re allergic to pollen that can be true, but isn’t quite accurate enough. There are many different types of pollen. Knowing which ones you’re sensitive to is important.

Here’s a breakdown of seasonal allergens:


Tree Pollen- If you have symptoms as early as February through as late as May, then tree pollen could be your trigger. Even before you see buds on trees up North the tree pollen from the southern states actually blows up North with southern gulf winds.

Grass Pollen- If your symptoms don’t start peaking until May then grasses may be your trigger. Grass pollen will generally begin in May and last through August. If you head outside on a sunny day and your neighbors are all mowing their lawns and you begin reacting, then grass may be your trigger.

Weeds- If your allergy symptoms seem to be the worst from June until the first frost then weeds could be your trigger.

Ragweed-
This famous Fall allergen will start to effect sufferers from August until the first frost.


Then there are year round environmental allergens you should also be aware of:

Molds- Indoor molds are present year round. But, outdoor molds peak in the damp months of Spring when the snow melts and it rains more frequently. Outdoor field molds (meaning smuts, mushrooms, and field grain dusts) are year round except when the ground is frozen completely.

Dusts and Danders- These are year round, but increase indoors when the forced air and furnaces are turned on.

You may have one of these allergies or, like me, you may have them all.
So, how do I treat my allergies and their symptoms? Other than just taking typical allergy medicines there are lots of short term (quick fix) treatment options you can implement to reduce your allergy symptoms and many of them are free.

Here are the Top 10 things that have helped me to reduce my allergy symptoms:

1. Don’t sleep with your windows open. I love having fresh air blowing through my home, but keep them closed especially at night. Leaving them open, especially at night, allows pollens to blow through your home all night while you’re laying there breathing them in.

2. Keep your home clean. Stay away from antibacterial cleaning products (Lots of research backing this one up, but that’s for another post. Trust me on this one.). Vacuum, dust, and wet mop your home often.

3. Protect your bedding with allergen/dust mite protecting covers. Most allergist will recommend that you get these covers for your mattress, comforters, and pillows. If you can only afford to get covers for one item get a cover for the pillow you sleep on. It makes a world of a difference.

4. Wash your bedding often. Wash your sheets and blankets in hot water to kill mites and get rid of pollens and danders that you’ve brought to bed with you. I’ve found that even if I don’t get around to changing my bedding as often as I should, if I change my pillow case, even that makes a huge difference.

5. When my allergies are worst (late Spring through late Fall) I have found that showering or at least rinsing off in the shower before bed has made a huge difference for me. When pollens are at their peak and you’re outside, you’re collecting all those pollens on you hair, skin, eye lashes, and clothing throughout the day. Then when you go to bed, you’re taking all those pollens to bed with you. Showering at night helped me even more than allergy medicines last Summer. Try it!

6. Change all your clothing before going to bed. For the same reason as #5. Your clothes gather pollens and danders throughout the day. If you go to bed wearing that clothing, you’re bringing all those allergens to bed with you.

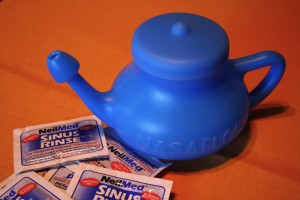
7. Use a nasal rinse, like the Netti Pot often during your peak allergy seasons. I know I’ve posted about the Netti Pot before, but it’s really been a life saver for me. During peak seasons try using it at least 2 times a day. It is a bit of a hassle, but really helps to relieve sinus pressure, congestion, and sinus headaches. I know the idea of saline liquid going through your nose isn’t really appealing and feels odd, but try it more than once. The first time its really strange, but I’ve gotten used to it. You can pick up a Netti Pot kit at the drugstore. Click here to see my previous post on the Netti Pot.

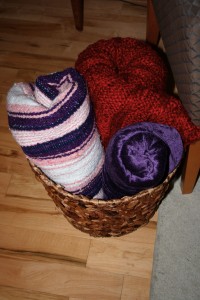
8. Wash your throw blankets and pillows often in hot water. You may forget about your pillows on your couch and those blankets you love to curl up with while watching a movie, but they collect dust, dander, and pollens just like your bedding. So, don’t forget to wash these often.

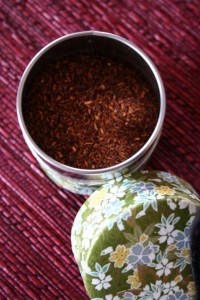
9. I discovered Roobios loose leaf tea (red tea) a couple years ago. I’ve found that high quality Roobios loose leaf tea relieves my allergy symptoms. It especially helps to relieve wheezing, coughing, and tightness in the chest. It has to be high quality, or I’ve found it doesn’t really work. I buy my Roobios Tea online from Our Special Tea.

10. Buy an air purifier for your home. Get one that has a a true HEPA filter (a HEPA type filter is NOT a HEPA filter) and a carbon filter. Run the purifier especially in your bedroom at night to reduce your symptoms. I have a Holmes air purifier that I use often.

Long Term Allergy Treatment:
Because I have so many allergies and they are pretty severe, I’ve turned to long term treatment for my allergies by doing immunotherapy allergy shots. The shots work by gradually introducing the allergens back to your body to reduce your body’s reaction to the allergens. They are not a short term fix. I have completed one full year of the shots and this year I’m feeling much better than last year. If you’d like to get more information on immunotherapy allergy shots click here for a link to my allergist’s website.

I hope this information will help you to manage your environmental allergies and their symptoms so that you can enjoy the great outdoors this Spring, Summer, and Fall and be comfortable indoors during the Winter. Just remember there is more that you can do to manage your allergies than just taking your typical allergy medicine. Here’s to beautiful Spring days!


Sweet Cupcake Beauties

Sweet Cupcake Beauties


I visited my sis, Sara, over the weekend and she’s been showing me some of the adorable cupcakes she’s been making. They’re so clever I thought I just had to share them with you. She’s been baking them following this cupcake cookbook called What’s New Cupcake? by Karen Tack and Alan Richardson. It has some really cute ideas for the most adorable cupcakes for any occasion. And these are definitely Kid Friendly, as the book has some wonderful ideas for cupcakes for kids’ birthday parties.


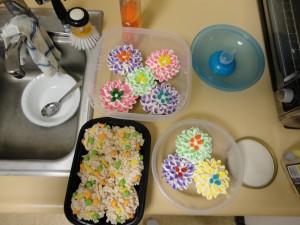
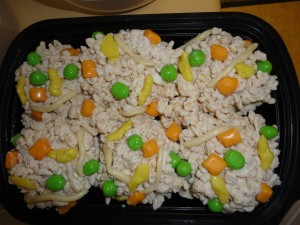
(Above Photo) Sara made these cupcakes for her boyfriend, as a special treat as they love to eat Chinese food together. These 6 cupcakes are put together in a pan to look like fried rice. The cupackes are topped with rice crispy treats and the veggies in the fried rice are mutlicolor Tootsie Rolls cut up. These would make a great gift for your Chinese-food-loving friends and would be adorable given in a Chinese food box.

(Above Photo) What a great way to welcome Spring with these colorful flower cupcakes. These beautiful flower cupcakes’ petals are made with miniature marshmallows cut in half and dipped in various color sprinkles with icing and jelly beans at the center. These little flowers would be a great Spring hostess gift, given in a basket with a layer of colorful cloth napkins underneath.

Try making these cupcakes allergen free. It will require quite a bit of replacement, but…hello…even those of us who can’t eat gluten, eggs, and dairy crave cupcakes.

Here’s how to make these tasty cupcakes allergen free:
Cupcake- I suggest just buying a mix like Hodgson Mills gluten free yellow cake mix
Eggs- Ener-G Egg Replacer
Dairy- Use whatever dairy substitute you can use (almond milk, rice milk, etc.)
Icing- Try Pamela’s Products gluten free icing mix

Thanks, sis, for the beautiful inspiration! Keep up the creative baking!

Corned Beef & Cabbage

Corned Beef & Cabbage


Its St. Patty’s Day and what better way to celebrate than with Corned Beef & Cabbage!
Here’s how I made my Corned Beef & Cabbage. Its really simple and the spiced aroma will flood your house with a mouth watering scent. Its not too late, so here ya go!

Corned Beef Ingredients:
1 package corned beef with spice packet
1/2 onion, roughly chopped
4 carrots, roughly chopped
3 potatoes, roughly chopped
water (enough to cover the top of corned beef)

Corned Beef Directions:
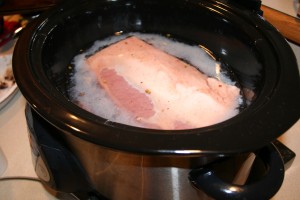
1. I made my corned beef by cooking it in my slow cooker with the spice packet and water to cover the meat for 3 hours on high.
2. I then placed it in a pot with the liquid on the stove, covered, at a simmer for half an hour.
3. Then place the potatoes, onions, and carrots in the liquid with the meat and simmer for an additional 15 t 20 minutes. Serve and enjoy.

*An alternate way to cook the corned beef is to simmer it with the liquid on the stove for 2 1/2 hours. Add the potatoes, onions, and carrots with 15 minutes remaining.

Sauteed Cabbage Ingredients:
1/2 head of cabbage, roughly chopped
1/2 onion, roughly chopped
1/2 teaspoon caraway seeds
1 tablespoon olive oil
2 tablespoons white wine vinegar
2 tablespoons butter
3/4 cup water
salt and pepper to taste

Sauteed Cabbage Directions:
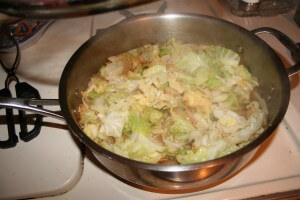
1. Heat olive oil in large frying pan on medium heat. Add onions and cabbage.
2. Add butter and salt and pepper to taste.
3. Sautee until cabbage begins to wilt and slightly brown. Add white wine vinegar, caraway seeds, and water.
4. Continue cooking until cabbage and onions are soft and most the water is absorbed.
5. Adjust salt and pepper to taste and serve.


Happy St. Patty’s Day! Hope you enjoy Corned Beef & Cabbage today. I know Matt and I always look forward to it. And don’t forget to wear green today!

Kid Friendly: Loaded Hashbrowns

Kid Friendly: Loaded Hashbrowns

Breakfast food isn’t just for breakfast anymore; I make this recipe for dinners as well.
One of the hard parts about my restricted diet is eating breakfast/ brunch foods out at restaurants…no eggs, dairy, or wheat makes brunch at a diner almost impossible.

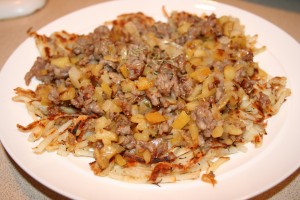
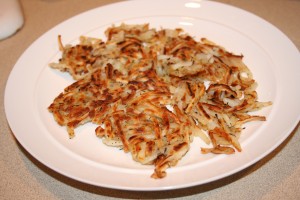
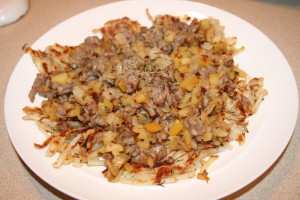
These Loaded Hashbrowns not only satisfy my craving for hearty breakfast foods, but are so simple. They make a quick tasty dinner on the go that’s really inexpensive. On a night you need a quick meal, give this one a try. And as I’ve learned, it’ll always take longer the first time you make a recipe. The second time, its always quicker.

This one’s definitely kid friendly. The apples and onions both caramelize creating a sweet flavor that blends with the saltier meats to beautifully complement the hashbrowns. Served with ketchup, what kid wouldn’t eat em’?

Ingredients:
2 tablespoons olive oil (may need to add a little more if ingredients stick to pan)
5 cups frozen shredded potatoes (about half a 26 oz. package)
1 teaspoon dried thyme
6 oz. breakfast sausage/ italian sausage/ left over ham (whatever you have)
1 medium apple, diced
1 small onion, diced
salt and pepper to taste

Directions:
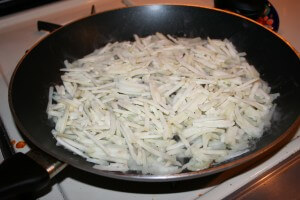
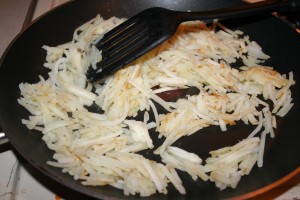
1. Heat 1 tablespoon olive oil in large frying pan over medium heat. Add frozen potatoes and sautee, stirring occasionally, for 8 minutes.
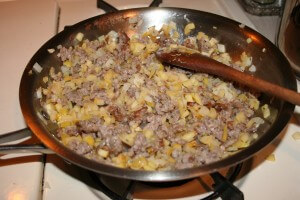
2. Meanwhile in a separate frying pan heat remaining olive oil over medium heat. Add apples, onions, and meat. Sautee until sausage is cooked and onion is transparent. Then add 1/2 teaspoon thyme and salt and pepper to taste.
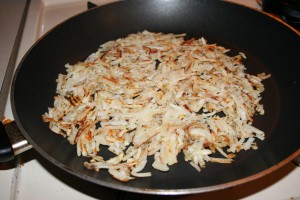
3. Add 1/2 teaspoon thyme and salt and pepper to taste. Cook until potatoes are golden brown, approximately 5 minutes.
4. Serve hashbrowns with apple, onion, sausage mixture on top and ketchup on the side. Enjoy!

If you’re really hungry this dish will serve 2 people. If you like a smaller portion it’ll serve 4 people.

This Loaded Hashbrowns recipe is based off of Better Homes & Gardens Anyone Can Cook, Shredded Potatoes with Sausage and Apple Recipe.

These Loaded Hashbrowns are great for breakfast, lunch or dinner. Hope you enjoy!

Lettuce Wrap Salad

Lettuce Wrap Salad

I love reinventing recipes to fit the ingredients I have on hand and the current needs for the particular meal…Let me explain!

This weekend I really wanted to make the Turkey Lettuce Wraps (I posted back in January), but I ran into some road blocks:
-The lettuce leaves I had were just not very big to hold the ingredients.
-I also didn’t have quite enough ground turkey.
-I wanted to use some rice noodles and fresh mushrooms I had on hand.

The Solution:
-Make the turkey for the lettuce wraps and the sauce as directed, I just made a smaller amount.
-Make it as a Lettuce Wrap Salad rather than actual lettuce wraps.
-I laid the bed of lettuce leaves down first, then added the layer of rice noodles, then the ground turkey, followed by the veggies (shredded carrot, diced green onions and mushrooms), and topped with a little of the sauce from the turkey.

The Result:
-It was awesomely delicious!

-It was less messy than regular lettuce wraps (no messy fingers)!

-This would make a great meal for left overs from the lettuce wraps when you may not have enough of each item to make the actual wraps.
-Its a great solution for those who need an easy lunch to take to work (and no messy fingers)!

Remember to make lemonade out of lemons! My encouragement is to take a recipe and adjust it to fit your needs…
Here’s to tasty food for every meal!

Sweet & Spicy Salmon with Pineapple

Sweet & Spicy Salmon with Pineapple

So, the weekend is finally here!
And you’re thinking about heading out to a restaurant to get a delicious meal because you’re not wanting to spend your whole night cooking, right?

At a restaurant you could spend $25 or more per plate for this salmon dish with roasted asparagus and sweet potatoes. But, I’m here to tell you that its really not a whole lot of work and it’ll save you quite a pretty penny to make it at home.

Here’s to cooking and eating great food at home!

Ingredients:
1/4 cup pure maple syrup
1/4 teaspoon cayenne pepper
1 pound skinless salmon fillets, cut into 4 pieces
coarse salt and ground pepper
pineapple peeled, cored, and cut into pieces (up to 1/2 a whole pineapple)
1/4 cup cilantro, chopped
*I’ve found that Walmart carries frozen wild caught salmon for a great price

Directions:
1. Heat broiler (or you can use your oven at 400 degrees).
2. In small bowl stir together maple syrup and cayenne pepper.
3. Season salmon fillets with salt and pepper. Use cooking spray or oil to prepare rimmed baking dish.
4. Arrange pineapple on the bottom of pan and then place salmon fillets on top.
5. Pour half of the maple cayenne mixture over the salmon.
6. Broil salmon for 8 to 11 minutes, pouring remaining glaze over it half way through. May need to cook a little longer if using the oven rather than broiler.
7. Serve salmon with cilantro and pineapple. Enjoy!
*This recipe pairs well with oven roasted asparagus and sweet potatoes.
*Recipe source: Martha Stewart’s Everyday Food, March 2011 edition

Have a great weekend and happy cooking!

Julia Child Inspired Dinner Party

Julia Child Inspired Dinner Party

Julia Child is a chef that gave new life to French food and brought those beloved European recipes into homes across the States. Her story and recipes are now being revisited by a whole new generation with the release of the film Julie & Julia in 2009. My friends and I are included in the group of those being reintroduced to this brilliant chef and her recipes. I remember seeing her on TV cooking shows on Saturday mornings when I was a kid and am now intrigued by and enjoying her tasty recipes!

This dinner party, hosted by my friend Mary, centered around this famous Julia Child inspired recipe: Beef Bourguignon.
Here’s a link to the recipe: http://abcnews.go.com/GMA/recipe?id=8222804
Its a little more complex than some of the recipes I’ve posted in the past and I have to admit that the version we made is not exact. You could say we simplified, but it was still delicious.

(Gluten Free: we used corn starch to thicken and make sure you used GF beef stock)

We started our dinner party sitting around the coffee table on floor pillows eating appetizers, enjoying a warm fire, listening to great music, and talking and laughing a lot.

Mary’s sweet little pup Jay Jay even enjoyed the warm fire with us on the cold winter night.

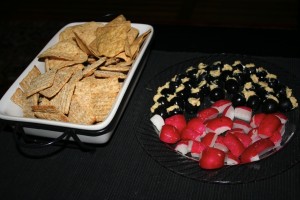
Our simple appetizers included crackers and tortilla chips, sliced radishes, and black olives stuffed with hummus (you could also use goat cheese or blue cheese). Remember the point of appetizers is just to give your guests something to munch on when they arrive. You don’t want them to fill up on them if you’re preparing a generous meal.

Our Beef Bourguignon progressed nicely and filled the house with a great aroma that definitely made us all crave the warm meal’s hearty goodness!

Serving the tasty dish right out of the pan not only keeps it warm and ensures you enjoy every bit of the pan juices, but also saves on dishes you have to wash (major bonus in my opinion)!

The Beef Bourguignon pairs really well with oven roasted white and sweet potatoes and red wine.

Hope this inspires you to start cooking! Remember even if you simplify complex recipes, you’re still cooking…props to all of you out there who dare to step outside of your food/ cooking box and try new things! Keeping cooking!

Kid Friendly Food: Grandma Jo’s Sloppy Joes

Kid Friendly Food: Grandma Jo’s Sloppy Joes

Every kid loves to dig into a tasty Sloppy Joe and what parent doesn’t laugh at the sight of a kid with a Sloppy Joe mustache?

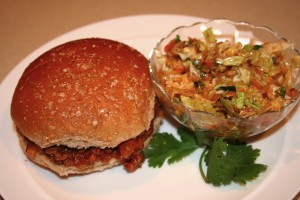
Well here’s a tasty homemade Sloppy Joe recipe from my adopted Grandma Jo. Grandma Jo, at 89 years old, still loves to share her delicious homemade food with all of us who love to eat! You know every time you eat a grandma’s food its going to be good because its made with love.

Grandma Jo just shared her delicious recipes with me and I’m now learning to cook them. I have to say, as exact as I follow a recipe, it just always tastes better when its made by a grandma…so here’s to all the grandma’s out there whose tasty food made with love is enjoyed by their grandkids every day! And this one is kid approved and allergen-free friendly!

Ingredients:
2 lbs ground beef
2 small onions, chopped
1 green pepper, chopped
1 bottle ketchup, medium sized bottle (not the large, not the small, see photo below)
2 tablespoons vinegar
1 tablespoon sugar
1 tablespoon dry mustard
1 cup water
salt and pepper to taste

Directions:
1. Brown meat in frying pan. Drain grease and put meat into saucepan.
2. Brown green pepper and onion then add to beef.
3. Then add remaining ingredients into saucepan. Stir and simmer for up to 1 1/2 hours ( I did it for a less time and it was still tasty). Serve and enjoy!

If you’re gluten free, you can still enjoy this recipe plain, eating it with a fork. Or try it on a gluten free bun (buy from Whole Foods or make it from scratch). I normally just devour it with a fork and still love it.

I served this one with a tasty homemade cole slaw, recipe to come in a later post.

Thanks to Grandma Jo for sharing her tasty recipe!

Stuffed Mushrooms

Stuffed Mushrooms

One of things I miss a lot, since going on my “special diet” (see the “Who is Madindy?” page for details) are appetizers and finger foods at parties!

Most of the time appetizers and finger foods include bread, cheese, and eggs somewhere in the mix. So more often than not I’m the one who’s loaded her plate with the raw veggies and fruits from trays and I eat them with no dip (most of the time because the dips are a dairy base). And people say, “are you on a diet?” “oh, you’re eating healthy!” And I’m thinking “oh, believe me if I could, my plate would be loaded with the cheese dips, crackers, cookies, breaded appetizers, etc.”

But, I’m very thankful that my dietary needs have taken me down this food exploration journey and I hope you’ll join me!

So, my allergen-free friends, or those just looking for tasty appetizers that are a bit healthier than those filled with cheese and bread, these Stuffed Mushrooms are for you! This recipe contains no animal products, so its considered Vegan as well.

They are so good that even my friends (who eat “normal diets”) loved them too, always a good sign!

Ingredients:
1 tablespoon olive oil
1/4 cup onion or shallot, minced
1/2 cup crimini mushroom stems, diced
3/4 to 1 whole carton of crimini mushrooms (stems removed and used for the above), cleaned
1 bunch collard greens or spinach, thinly sliced yielding 1/2 cup
1/4 cup tomatoes, diced (small)
1 teaspoon basil (dried or fresh minced)
1 teaspoon Italian parsley (dried or fresh minced)
3/4 teaspoon (gluten free) soy sauce
1/2 teaspoon minced garlic
Pinch red crushed pepper
sea salt to taste

Lemon Herb Marinade Ingredients:
1 cup water
2 tablespoons fresh squeezed lemon juice
1 tablespoon (gluten free) soy sauce
1 tablespoon Italian parsley (dried or fresh minced)

Directions:
1. Preheat oven to 375 degrees. Place mushroom caps in marinade blend for at least 20 minutes.
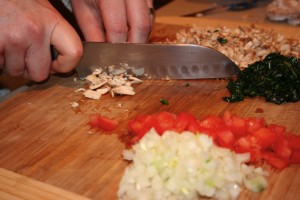
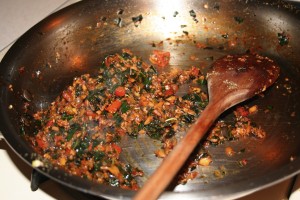
2. While mushrooms are marinating, place oil in sautee pan. Add onion/shallots and minced mushroom stems and cook for 5 minutes, stirring frequently. Then add collard greens/spinach and tomatoes and cook for 5 minutes. Then add remaining ingredients, mix well and remove from heat.
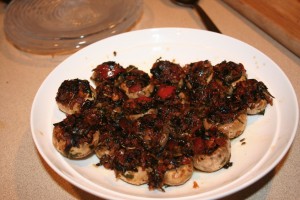
3. Remove mushroom caps from marinade. Fill each cap with mixture. Place on baking sheet in the oven for approximately 10 minutes or until mushrooms are soft, careful not to overcook. Enjoy!

Serves: 4

* Recipe source: http://www.bewellbuzz.com/recipe-buzz/vegan-spinach-stuffed-mushrooms/

Spring Baby Shower Decor

Spring Baby Shower Decor

As promised earlier this week, here are the pics from Baby Shower last weekend that I did the decor for (with lots of help from friends may I add). I searched around the craft store for about an hour trying to find the perfect thing. Again, it had to be not “babyie” it needed to look fresh and welcoming and be gender neutral. We didn’t want to spend a bundle on decor, but wanted it to be really special. So, here is how it all came together.

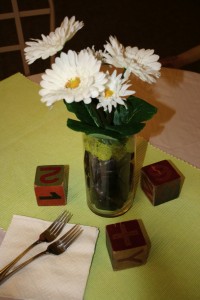
Five of the table had the center piece shown above. A small bunch of silk daisies, in a clear cylinder vase filled with natural stones and green moss. A friend had a bunch of the antique baby blocks that added a beautiful touch to each table.

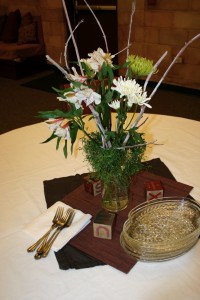
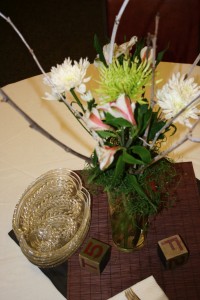
For 2 of the centerpieces I bought 2 bunches of fresh flowers (one for each vase) and had these twigs I painted white for a winter centerpiece. I placed them together in taller clear cylinder vases and stuffed a little green spanish moss to pour out of the top (holding the stems all in place).

Earthy and simple!

The diaper cake was elegantly placed on a cake stand with a clear plater on top (nice touch June) on the gift table!

On the drink table sat an antique baby wagon with more of the antique baby blocks, a colorful runner (really placemats we pulled together), and a 3 tiered stand with chocolates and coffee accessories.

Eating, chatting, laughing, and loving on the mom-to-be!

A great time celebrating a wonderful blessing in life! Great job ladies for pulling off a wonderful shower! Only a month until we’ll all get to meet the new little one!