Spring Has Sprung: Gardening Jumpstart #1

Spring Has Sprung: Gardening Jumpstart #1

I think it’s now safe to say that Spring has FINALLY Sprung in the Chicagoland region where I live! After a rough winter with one of the worst blizzards in history, I have to say I couldn’t be more grateful for Spring than I am this year. Sure the official date of Spring was a while ago, but the temperatures are just now starting to show signs that my beloved season, Summer, will in deed be on its way this year. The trees are just beginning to bud and the crocuses, daffodils, and tulips are now peaking their greens and blooms through the mulch and grass. I now consider it Spring!

As you have been able to tell from the wide variety of topics I share on this blog, I have a lot of interests, passions, and hobbies. One I’d like to share today is my love for gardening! Why Gardening you ask? Gardening is such a relaxing activity that Matt and I both love. It’s a low cost activity for us and allows us something to enjoy outside all summer long. We hope to use it as a source of organic produce as well.

Looking for a way to keep your kids busy outside when the weather is nice? Introduce them to gardening. It’s a great way for them to burn energy outside, while also educating them about biology, God’s creation, healthy eating, and introduces them to a new hobby! Have a picky eater? Try getting them involved in growing some of their own food. There’s significant research that shows that kids are more likely to eat fruits and vegetables if they take part in cultivating them.

I may be slightly high maintenance (my hubby will laugh at the word slightly), but I have to say there is nothing better than hands, feet and knees covered in dirt from working outside. I can’t say I’ve acquired a completely green thumb, but it’s getting greener as I learn more. So, I invite you to join me in getting a little dirty this Spring and start a garden of your own.
How do you start a garden of your own? Here’s how I started mine.

For the past few years we resided in an apartment with just a balcony of outdoor space, but because we both love gardening we made it work and covered our balcony with planters as if it were a yard. We grew everything from various flowers to herbs to tomatoes to cucumbers and radishes. (I had to draw the line though when Matt wanted to plant corn).

Now we live in a house with a yard, so we have the room to plant much more. But, I encourage you if you just have a small balcony fill it with planters and enjoy!

Start your gardening season by first cleaning up your yard or whatever planting space you have. If you only have a balcony, congrats, less to clean up. If you have a yard, rake up the leaves and sticks that have been blowing around your yard all winter. Especially pay attention to your flower and garden beds by cleaning up dead plants from the previous year.

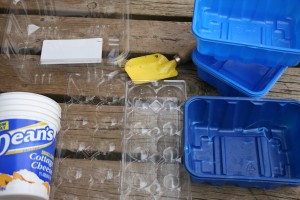
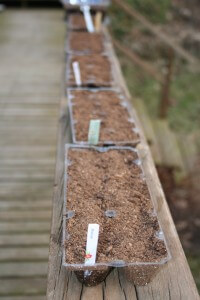
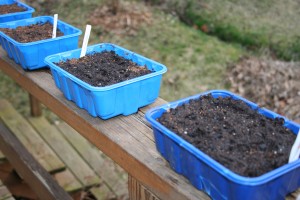
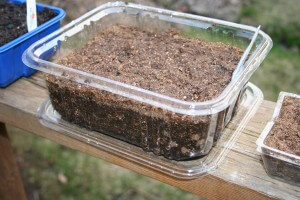
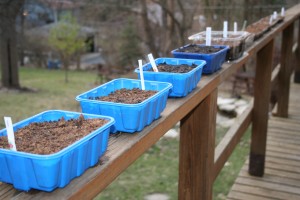
I decided to start some of my plantings indoors this year as its still a little chilly to plant certain crops. I’ve seen the cute little planting trays in the stores, but my frugality and hate for waste kicked in and I collected my own. Egg cartons, cottage cheese containers, trays that you get mushrooms and mixed greens in work perfectly. I poked holes with a knife in the bottom of all the containers except the egg crates because the cups are so small. I’ve been collecting these for a few weeks now. I encourage you to dig through your recycle bin and get creative.

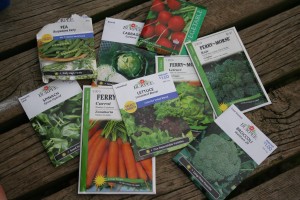
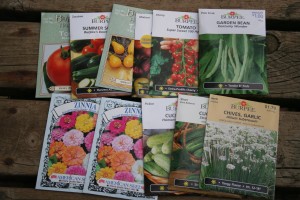
I don’t normally grow everything from seeds and I suggest if you’re just starting to garden to start some things like tomatoes from plants you buy at your garden store. I thought I’d be a little more adventurous this year and try to plant more from seeds. We’ll see how it goes!

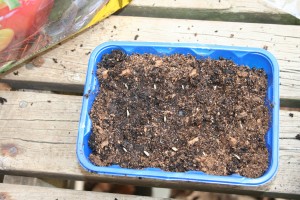
I used a combination of soils to start my container plantings indoors. When planting from seeds use some seed starting formula soil. It’s available at garden stores and larger stores like Walmart that have a garden department. I mixed some of the seed starting formula with some potting soil. Follow the seed packet directions for the depth the seeds should be planted. Cover and water thoroughly (gradually for the ones in the egg cartons).

Make sure to keep the names of the plants with each container so you don’t forget what’s in each one.

Bring them inside and place in windows that get sunlight. Seeds are supposed to begin to sprout in 7 to 14 days. I’m only on day 2 myself so I’ll let you know how they work.

Make sure to put something underneath the containers that you poked holes in. The lids of some of the containers work really well for this purpose.

I hope this gets you excited to start your own planting this year. Gardening doesn’t have to be anything major. You can start this year by just growing some tomatoes in pots and then add some more each year. Stay tuned and watch how my garden grows this year. Let me know how it goes!

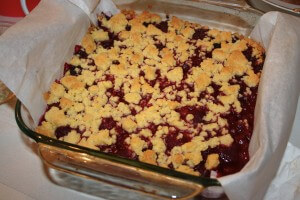
Raspberry Cornmeal Crisp

Raspberry Cornmeal Crisp

I thought I’d wrap up the week with a sweet treat that’s sure to satisfy your sweet tooth! I have to admit that my general consensus on sweets is that if its not chocolate don’t bother. But this one is quite tasty even without chocolate.

This Raspberry Cornmeal Crisp uses Spring fruit, but admittedly I wouldn’t consider it healthy…you’ll see what I mean when you see the amounts of sugar and butter. I’m not an advocate for eating an healthy diet, but a little sweet can curb your cravings and keep you from binging. My advice with sweets: Don’t waste the calories and sugar on processed sweets…if you’re going to eat sweets make them the really good homemade ones!

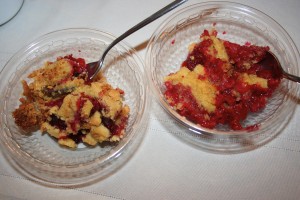
This is another Everyday Food: A Martha Stewart Magazine, April 2011 Issue recipe. I adapted Martha’s recipe to fit my restricted diet and it came out really well. Martha says to cool the crisp and cut it into bars, but yeah right…let it cool after it comes out of the oven hot and gooey? I don’t think so. We served it warm and when warm it reminds me of a crisp. When its served cold it reminds me of shortbread with fruit. So, try it either way you like.

Ingredients:
1/2 cup cornmeal
2 cups gluten free all-purpose flour (spooned and leveled)(I used Bob’s Redmill Brand)
3/4 cup sugar
1/2 teaspoon coarse salt
1 cup (2 sticks) unsalted butter, melted
10 ounces frozen raspberries

Directions:
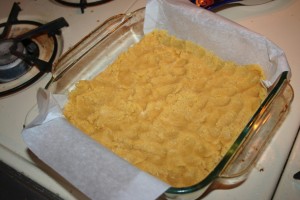
1. Preheat oven to 350 degrees. Line an 8 inch square baking dish with parchment paper, leaving a 1 inch overhang on 2 sides.
2. In a large bowl, mix together cornmeal, four, sugar, and salt.
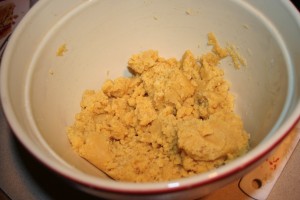
3. Add butter and stir or mix with your hands until ingredients are evenly moistened.
4. Press about 2/3 dough into the bottom of the dish.

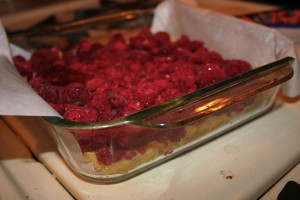
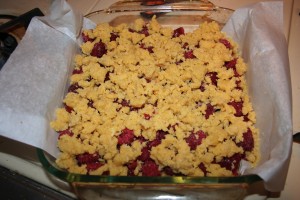
5. Scatter raspberries over the top and crumble remaining dough over the raspberries.

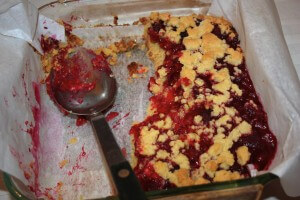
6. Bake until top is golden brown, 35 to 40 minutes. Let cool and cut into bars or spoon hot into dishes. Eat and Enjoy!

Buttery Shrimp & Radish Pasta

Buttery Shrimp & Radish Pasta

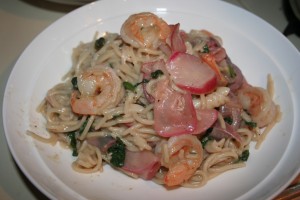
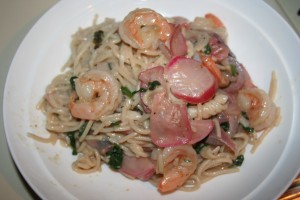
As promised here is one of my new favorite recipes that uses radishes. Its a delicious flavor combination that swirls together the flavors from the buttery shrimp, the spicy radishes, and a touch of garlic to create this dish. This pasta dish really hit the spot for me. I love pasta dishes but can only eat it when I make it, as gluten free and dairy free recipes in restaurants is still a challenge. So this one is a nice change to my staple pasta with pasta sauce.

This recipe is a great choice for someone who isn’t sure if they like radishes or not, as cooking them mellows out their flavor a bit.

Ingredients:
Coarse salt and ground pepper to taste
3/4 pound Gluten Free linguine or other long pasta
1/4 cup unsalted butter (if you can’t eat butter you could use margarine or just olive oil)
2 cloves minced garlic
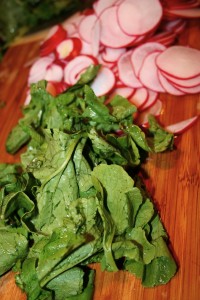
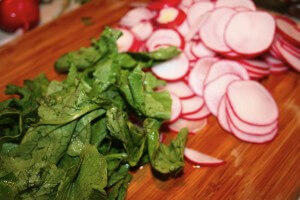
1 large bunch radishes, thinly sliced (I used a mandalin) with greens rinsed well and roughly chopped
1/2 red onion, sliced
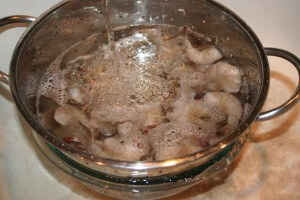
1 pound frozen large shrimp, peeled, deveined, and thawed

Directions:
1. Cook pasta in a large pot of boiling salt water; drain and set aside, reserving 1 cup of pasta water. Add 2 tablespoons butter to the pasta and toss until it melts; keep pasta warm.


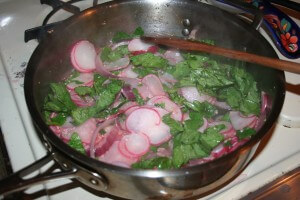
2. Meanwhile in a large skillet melt 1 tablespoon butter over medium high heat. Add garlic, onions and radishes and cook, stirring occasionally until radishes are crisp-tender, 3 minutes.
3. Add radish greens and cook until wilted, seasoning with salt and pepper. Then add to pasta and stir to combine.


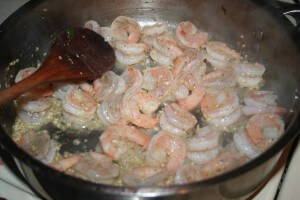
4. In the same skillet you used to cook the veggies, melt 1 tablespoon butter. Add the shrimp, seasoning with salt and pepper. Cook, stirring occasionally, until the shrimp are opaque throughout, about 4 minutes. (They will curl up and turn a slightly orange color when cooked through).
5. Add shrimp to pasta and toss, adding enough pasta water to create a light sauce that coats pasta. Serve and enjoy!

I suggest to make this recipe make sure to cut up all the veggies first and to peel, devein and thaw the shrimp before you begin cooking. I added onion to the original recipe to add extra flavor.

*Recipe serves 4 people
*Recipe source Everyday Food: A Martha Stewart Magazine, April 2011 Issue

Closer Look: Radishes

Closer Look: Radishes

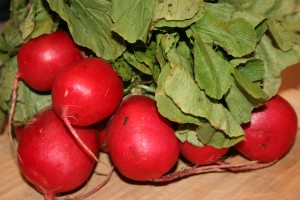
Today I’m taking a Closer Look at radishes. If you’re like me, you’ve seen others eat them, tried them once or twice in the past and didn’t like them. My grandpa used to grow them and my husband has grown them and I just always thought that I didn’t like them, so I didn’t eat them.

So, why am I taking a Closer Look at radishes today? I was at my friend Mary’s house for a party a couple months ago and she had radishes on an appetizer tray. I tried them and actually really liked them! Who knew? It hadn’t been that long before that I tried them and didn’t like them. But for what ever reason I do now and I’m really glad. So here’s a Closer Look at these little red roots and why you should give ‘em a try again!

What are radishes?
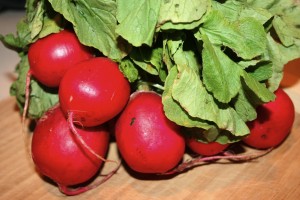
Radishes are a member of the cruciferous family, which means they’re related to broccoli, brussel sprouts, and cauliflower. There are several different varieties of radishes. They vary in color from red to purple to black to white. They can be very small or rather large. You can not only consume the root, but the greens as well. The mustard oil found in the vegetable gives it its tangy flavor.

How to select the best radishes?
Look for radishes that have brightly colored roots that are firm and have crisp greens.

What are the nutritional benefits of eating radishes?
These little guys are packed full of the good stuff. They are high in the cancer fighting antioxidant vitamin C and the greens have even more than the roots. Radishes are a great source of folic acid, calcium, iron, potassium, and thiamine. They are a great source of fiber and have been traditionally used to relieve constipation and assist with weight loss. They’re low in carbs and help to keep the liver and kidneys functioning properly.

What are some various ways to use prepare radishes?
You can eat radishes and their greens raw. They make a nice addition to salads and veggie appetizer trays. I like to eat them raw with hummus. You can saute them and include them in a variety of dishes. Add them into anything you want to add a little zing to, including pasta dishes and vegetable sautes.

Stay tuned this week for one of my new favorite pasta dishes using radishes.

I hope you’ll give radishes a first or maybe a second try. You never know, they could become a new favorite for you!

*Source: www.brighthub.com/health/diet-nutrition/articles/42219.aspx

Sauted Mushroom Side Dish

Sauted Mushroom Side Dish

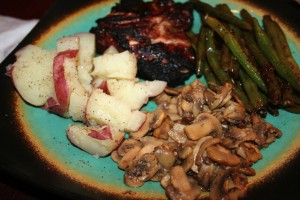
Mushrooms are tasty cooked into various sauces, soups, and pasta dishes. But I’ve found their a really great side dish to grilled meats and especially steaks. This recipe is much like a recipe your grandma would give you, not really exact measurements but a little of this and a little of that. Its very simple and very tasty!

Ingredients:
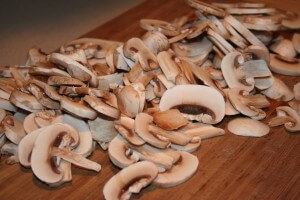
Sliced mushrooms
Minced garlic
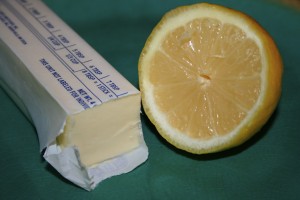
Lemon (for juice)
Butter
Sherry cooking wine

Directions:
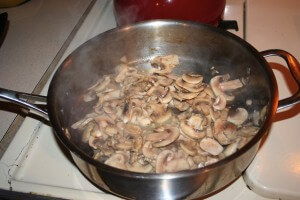
1. Heat some butter over medium heat in a saute pan. Add the sliced mushrooms to the saute pan and cook until they start to soften.
2. Add some more butter as you cook the mushrooms. Add a spoon full of minced garlic and a squeeze of lemon juice.
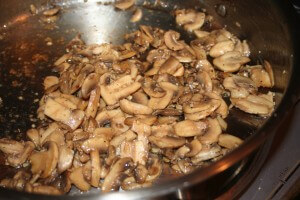
3. Continue cooking until the mushrooms are cooked through and right before you remove from the heat add a little cooking sherry. Enjoy!

Clever Throw Pillows

Clever Throw Pillows

Over the last year I have continued to see and been enamored by throw pillows I’ve seen in home stores and magazines. Their beautifully patterned prints and various textured fabrics really make even the dullest of sofas really pop. I think of throw pillows like the special spice that really makes a recipe zing. They can just add so much.

My dilemma: I’m always attracted to the most expensive throw pillows. I like rich fabrics and expensive designer prints, but don’t have the budget to add them to my own living room.

I kept thinking “why don’t I just buy some fabric and make my own throw pillows?” I searched around online for fabrics that caught my attention, but again I seemed to like the fabrics that cost upwards of $40/ yard or even more. Again, out of my budget…I’m really frugal and sometimes just cheap.

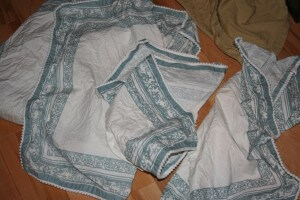
My solution: One day I was walking through World Market and saw they had a clearance section of cloth napkins and cloth placemats and the light bulb went off! I loved the fabrics and prints and they were already the size of throw pillows. There was a nice blend solids and prints that coordinated well. At $1 to $3 each I decided I had nothing to lose.

And my quest to turn these remnant cloth napkins and placemats into throw pillows began!

I wanted to make the throw pillow covers have a removable pillow insert so I could wash them. So, the only other thing I needed to buy was pillow stuffing and fabric for the insert pillows. I stopped by the craft store and a bag of pillow stuffing was anywhere from approximately $15 to $25. And I thought, yeah right…there has to be a cheaper way to make a pillow. And I found one. For $2 to $3 each I bought bed pillows from Walmart. Not only did I have my pillow stuffing, but also my cloth for the pillow inserts.

So, here’s how I made my throw pillows and how you can make yours as well!

In addition to the fabric (napkins or placemats) and cheap pillows to pull apart for the stuffing and fabric,
you’ll need a sewing machine, thread, pins, fabric scissors, and upholstery needle for your sewing machine (which I’d highly recommend using because when I used regular sized needles for my machine I broke 2 needles trying to make it work. Invest in the upholstery needles).

1. Wash the cloth napkins or cloth placemats first. This is really important as most of the fabrics will shrink a little and some more than others.

2. Find which fabric you want for the front of the pillow and which you want for the back. I suggest you use the napkin or placemat to its full size (don’t fold it down to fit the backing fabric). The backing fabric needs to be a little larger than the front fabric.

3. Iron both pieces of fabric (check the tags’ care directions first).

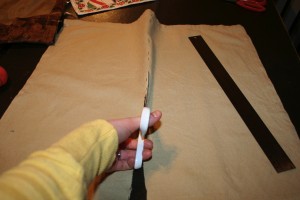
4. Using fabric scissors, cut the backing fabric in half where you want the opening for the pillow insert to be.

5. Pin back the un-hemmed edges you just cut and sew along those edges to finish them.

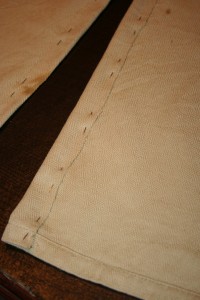
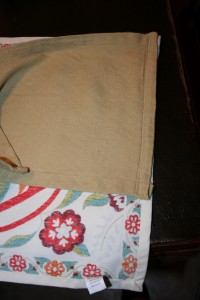
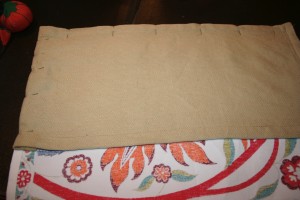
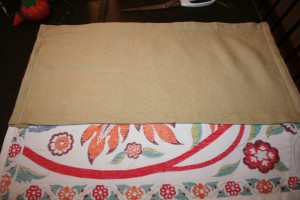
6. Line up outer edges of fabric, using the front fabric as a guide and starting in one corner. See photo below. Pin one of the short edges of the front and back face together, print sides out. And sew short sides of fabric together, on the inside of the fabrics edge.

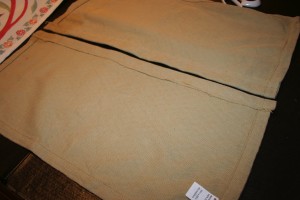
7. Pin the long side of both pieces of fabric together. Then fold under the backside fabric on the short end to align with the end of the front fabric, pulling taught, and pin along this edge. Sew along these edges on the inside of the finished edges of the fabrics. See photo below.

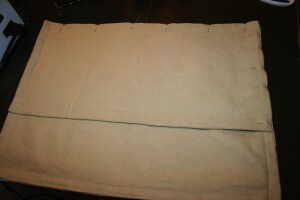
8. Repeat steps 6 and 7 with the other piece of backing fabric, overlapping the middle edges by at least 1 1/2″.

9. Create insert pillow by sewing two pieces of fabric together face sides in on three sides and half of the 4th side. Turn the fabric face side out. Stuff the pillow. The hand stitch the remaining opening.

10. Stuff the insert pillow into the pillow case and voila!

You’ve created a beautiful throw pillow that will turn a nice chair into a “Oh, what a cute chair”!

Potato Soup with Sausage

Potato Soup with Sausage

The sun is shining, the birds are chirping, and the grass is slowly changing from brown to green, but old man winter isn’t going down without a fight this year. Although Spring is here, its been pretty cold in the Chicagoland area over the last week. So warm, hearty soup really hit the spot for me this week. This recipe incorporates some fresh, almost Spring ingredients, while providing that “warm you from the inside out” feeling that is so satisfying when its cold outside.

I hope this one will keep you warm until Spring weather actually turns the bend and old man winter finally gives up for the year.

Ingredients:
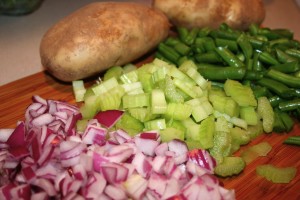
1 pound GF pork sausage (links cut into 1/4 inch slices or ground sausage will work) (I used ground GF Italian sausage)
1 cup celery, sliced
1/2 cup onion, chopped
1/2 teaspoon dried thyme
1/2 teaspoon salt
2 tablespoons GF all purpose flour
14 1/2 ounces GF chicken broth
1/2 cup water
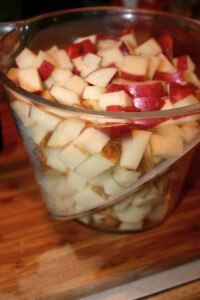
4 medium potatoes, diced (4 cups worth) (I left the skins on because of the nutrient value in the skins)
1 cup milk (or unsweetened milk substitute) (I used rice milk)
1 cup green beans, sliced and partially cooked
Chopped fresh parsley for garnish

Directions:
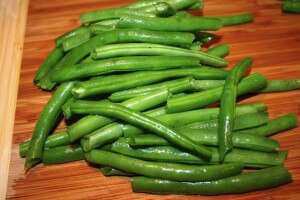
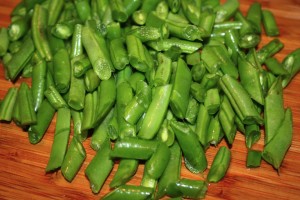
1. If you’re using fresh green beans snap the ends off and cut them into bite sized pieces (see photo below). Blanch the green beans by bringing a small pot of water to a boil. Add some salt and boil the green beans until they turn bright green and soft.

2. In a heavy saucepan brown sausage over medium heat. Remove sausage and set aside. Drain all but 1 tablespoon drippings.
3. Saute celery, onion, thyme and salt until onion is tender. If veggies start to stick add a little olive oil.
4. Stir in flour and cook for 1 minute. Gradually add broth and water, stirring until the mixture comes to a boil.
5. Add potatoes; cover and simmer 25 minutes or until potatoes are tender. Add a little more water if it becomes too thick. Stir often.

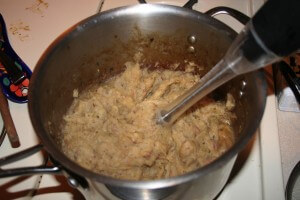
6. Use a submersion blender to puree the soup. Or if you don’t have a submersion blender allow soup to cool a little and then puree it in batches in a blender.
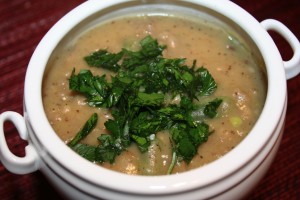
7. Add milk, beans and sausage into the saucepan. Heat through. Then serve with garnish of fresh parsley. Enjoy!

I know it looks a little like gravy, but it has a really delicious flavor. If it gets a little thick you can add a little more milk to thin it. This recipe serves 4 people.
*Recipe Source: The Country Cooking Recipe Collection, Prize-winning Soups & Sandwiches, 1993 edition, Submitted by Dorothy Althause, Magalia, California
*GF= Gluten Free

Grandma Jo’s Chicken with Mushrooms

Grandma Jo’s Chicken with Mushrooms

I’ve come to the conclusions that you know a recipe is going to be really good when it’s made by a grandma, who has cooked it for her family for 50 years, never written it down, and says she just adds a little of this and some of that.

This is my adopted grandma, Grandma Jo…that’s right, she’s not related to me by blood. She adopted me and Matt as her adopted grandchildren and we adopted her as our adopted grandma. Its kind of a long story of how this all came about, but long story made short: We met Grandma Jo through the Adopt-A-Grandparent program that I helped run in college. Because I was heading up the program and running the events I wasn’t going to adopt a grandparent myself, but Grandma Jo said “nonsense, you need a grandparent too.” We hit it off right away and felt like we had known each other forever. At the time, all of my grandparents had just passed away and I really missed having grandparents. Grandma Jo had always wanted grandkids. So, this was all perfect timing and we’ve been her grandkids and she’s been our Grandma Jo ever since.

Grandma Jo, a seasoned cook, full Italian heritage and born in Chicago in 1920, has stories better than any screen play ever written. She often has us over for dinner, cooking her homemade recipes, we listen to old records, play dominos, and talk to her about the decades past. Grandma Jo has so graciously shared many of her recipes with me and this is one of my favorites.

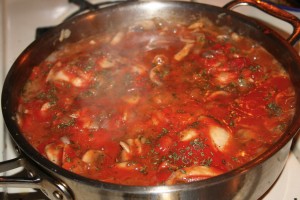
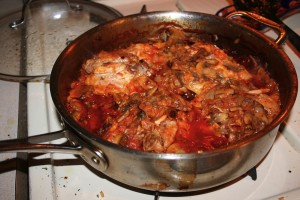
This one she just calls Chicken with Mushrooms. Its an Italian recipe that’s full of flavor and fairly simple to make. So, I hope it could become a staple recipe for you, like it has for me.

Ingredients:
1 package of chicken thighs (anywhere from 2 to 3 pounds worth)
3 tablespoons olive oil
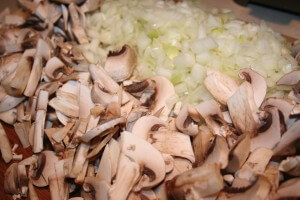
1 container mushrooms, sliced
1 large onion, diced
1 small can of tomato sauce
Fresh parsley, chopped, add to taste
Salt and pepper to taste

Directions:
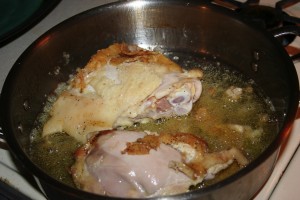
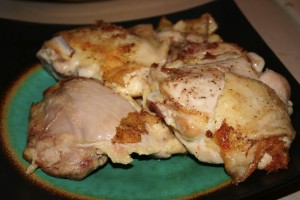
1. Wash chicken with water and salt and pepper. In a large frying pan add olive oil over medium heat and carefully add chicken thighs, skin side down. Brown chicken thighs on all sides. (To avoid oil splatter you can remove the pan from the heat and lay the chicken thighs down gradually)
2. Remove chicken thighs and set aside.

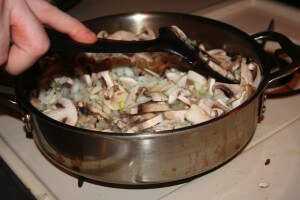
3. In the same pan sautee mushrooms and onions. You may need to add a little olive oil if they start to stick. Heat until the onion is translucent.
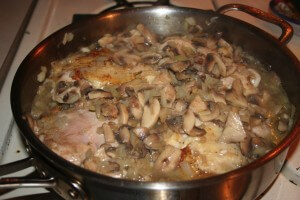
4. Add the tomato sauce, 3/4 of the tomato sauce can of water, the chicken and parsley into the frying pan. Mix all together and cover on low to medium heat. Cook for 45 minutes, turning the chicken over at least once. Adjust salt and pepper to taste.

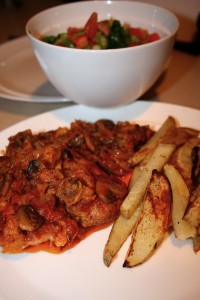
5. Serve chicken on top of pasta or with a side of oven baked potato wedges. This recipe serves 4 people. Enjoy!

Thanks to Grandma Jo for sharing her delicious recipes!
Allergen Free Cupcake Tasting

Allergen Free Cupcake Tasting

Who doesn’t love cupcakes? I know I do. Well, today I had the privilege to take part in an allergen free cupcake tasting.

A friend of mine, Cheyne (pronounced Shane), is a cake artist who is just beginning to launch an allergen free line of cupcakes. Cheyne turned his passion for creating beautifully sculpted cakes into his business called Compelling Cakes. He not only creates beautiful occasion cakes, but bakes delicious cupcakes, or so I heard from everyone else because I could never eat them.

After telling him my personal frustration and disappointment of finding gluten free baked goods that contain eggs and dairy (other top allergens) at local bakeries, he decided to create an allergen free line that both me and another allergen free friend could both eat. He’s been working hard at perfected his allergen free line of cupcakes and his hard work has paid off.

Cheyne held his first allergen free cupcake tasting earlier this afternoon at Cafe Firefly in downtown Algonquin (IL), where Cheyne’s cupcakes and other baked goods can be found. He invited the local allergen free crowd to sample his cupcakes and can I just say….yummm!

I just had to share this beautiful arrangement that John Regan of Twisted Stem Floral in Crystal Lake sent along to Cheyne to congratulate him on his new line of cupcakes and to have in the cafe for the tasting. Its a gorgeous arrangement and looks great on the cafe’s counter. Great addition to the tasting; I just love flowers!

At the tasting I got to sample Cheyne’s allergen free chocolate cupcake, salted caramel cupcake, and chocolate bourbon cupcake. It was a delicious afternoon! The cupcakes were actually moist, light and fluffy and the icing was smooth and sweet. Texture is always difficult with allergen free baked goods, but Cheyne nailed it. I’m so excited to be able to actually go to a coffee shop and buy a cupcake! Another simple joy added back into my life.


At the tasting Cheyne had all the ingredients out that he used for the cupcakes, just in case there were any questions. Great idea when you’re baking for people with food allergies.

His allergen free cupcakes will be for sale really soon, so make sure to follow him on Facebook (Compelling Cakes) to stay tuned. Or stop in to Cafe Firefly to check out the regular cupcakes he has available right now.

Even better, if you’re in the area (Algonquin, IL) next week you can take part in the second allergen free cupcake tasting he’s having. The tasting will be held next Tuesday, March 28th at 10 am at Cafe Firefly . Please let Cheyne know if you plan to come by dropping him a line on his Facebook page, Compelling Cakes. Thanks to Cheyne for the tasty allergen free cupcakes this afternoon. As a part of the allergen free community thank you, thank you for giving all of us another option!

*Compelling Cakes allergen free cupcake line stays away from gluten, eggs, and dairy. Please follow up with Cheyne at Compelling Cakes on Facebook for more details.

Delicious Gluten Free Bread

Delicious Gluten Free Bread

I have to confess that this week I’ve been thoroughly enjoying rediscovering why the American diet consists of so much bread…I mean, I can’t eat gluten so its “Special Bread” but its still bread none the less. After all bread can be made into toast, used to create a delectable sandwich, or eaten as a side with soup. And I’ve really been enjoying it this week.

If you’re like me and you are gluten free, then you know what I mean when I say I don’t take bread for granted like I used to. Because of my combination of gluten, dairy, and egg intolerances many of the premade gluten free breads are not options for me. And to be honest the premade gluten free breads that I have had are really not that great. They crumble to pieces when you try to eat them and tend to be very gritty in texture.


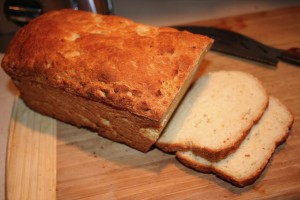
So, today I’m sharing my secret on how I enjoy delicious, soft, chewy bread that doesn’t have gluten, dairy, or eggs in it. I make my typical bread I use for sandwiches or toast from Bob’s Red Mill Gluten Free Homemade Wonderful Bread Mix. And can I just say that it is indeed Wonderful!

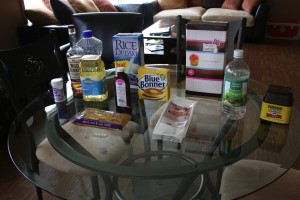
The bread mix comes with a yeast packet and the other dry ingredients for the bread (various other flours blended). You’re just required to add some sort of milk (I use rice milk), eggs (I use egg replacer), apple cider vinegar, and butter.

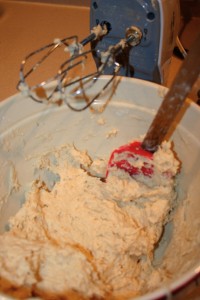
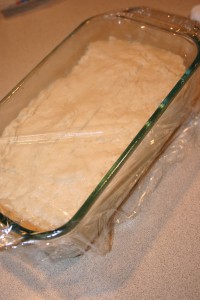
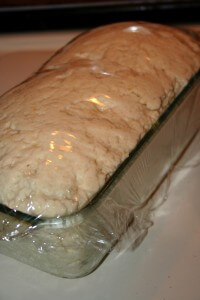
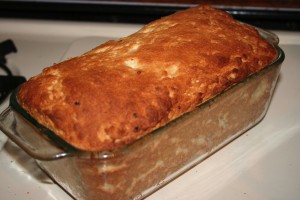
The bread can be made using a hand mixer and an oven or you can use a bread machine. I generally blend all the ingredients together using my hand mixer. Then I let the bread rise for about 45 minutes and bake it for 45 minutes to an hour.

I know it does take a good amount of time to make it, but the ability to enjoy delicious sandwiches and toast makes it so worth it. I really love that I have been able to buy this particular bread mix at my local supermarket and also have found it at Walmart. It makes it nice not to have to make a separate trip to a specialty store during busy weeks.

The full directions to make this bread are on the package, so no need to list them here. I just wanted to open up your gluten free world to my favorite bread. Its been a sanity saver on my diet. Even though you’re gluten free you can still enjoy piece of toast at breakfast or a sandwich for lunch. So, eat up!