Author Archives: madindy

Vivacious Vacations: St. Louis

Vivacious Vacations: St. Louis

I love to travel, seeing new things, new places, new people and trying new food! I thought I’d share some of the great places that I’ve had the privilege of visiting; some that may be close to home and some a little further away.

So, I’m launching the new segment today I’m calling Vivacious Vacations, where I’ll feature a place (city, town, country, beach, campground, etc.) that I enjoyed so much and think you might as well! Some were just weekend trips and others were weeks long. I’ll show you the great things to see, to do, and to eat!

For our first Vivacious Vacation I’m featuring St. Louis!

Why I’m featuring St. Louis?
Both my roomie from college and my husband’s roomie from college live in St. Louis. A group of us decided we didn’t want to lose touch so we decided that every Spring us northerners would take a long weekend trip down South and every Fall the southerners would trek up North.

I’ve driven through St. Louis at least 20 times and never really stopped to explore the city. So this trip last Spring was full of the locals showing us the ropes…my favorite way to explore a new place! So, here’s St. Louis!

Having loved and studied so much architecture, St. Louis is a city that excites me with its rich architectural history. The city is filled with beautiful brick buildings that scream craftsmanship long gone.

My college roomie, Shelly, and her hubby, Andy, live in a piece of history in downtown St. Louis. This beauty above is where they call home. It dates back 150 years, built by a man who was a doctor in the civil war. Stay tuned for a future post where I’ll feature Shelly and Andy’s gorgeous historic home, so you can see what they’ve done with the place!

The first stop in St. Louis seems to naturally be the Gateway Arch. Towering 630 ft above the banks of the Mississippi River, it was built as a symbol of Westward Expansion. Designed by architect Eero Saarinen, the monument was completed in 1965 and is open to the public.

Yes, that’s right, you can not only hang out at the base of the arch, but you can ride in a little cart to the very top!

Overlooking: One of my favorite things to do in any city I visit is to trek to one of the highest points in the city to overlook from a bird’s eye view. It gives a visitor a totally new, bigger picture, perspective of the city. The view from the top of the arch does just that!

I know you competitive northern baseball fans will cringe, but I highly recommend visiting a Cardinals’ game at Busch Stadium when in St. Louis.

Its not only a great sporting event, but the view of the city from the stadium is beautiful!

And the fireworks show is stunning…added entertainment to the evening!

One of my favorite things we did in St. Louis was visiting the historic Soulard Farmer’s Market. This year round farmer’s market is one of the oldest farmer’s markets west of the mississippi with its first structure dating back to 1843.
www.soulardmarket.com/soulard_farmers_market_003.htm

The market is not only filled with beautiful sights, but the sounds of the local street performers makes for a lively atmosphere and great music!

With aisles and aisles of local fruits, veggies, flowers, meats, cheeses, breads, pastries, snacks and lots of samples it made for a fun afternoon of food a local flavor. And by the end of the visit we had enough food to cook up a tasty dinner made from all fresh local produce.

I love finding free things to do in cities and St. Louis has plenty of things to do for free. The Budweiser factory is located close by Shelly and Andy’s house, so they knew that on certain days you can go get your picture with one of the Budweiser Clydesdale’s.

Another free activity in St. Louis is the zoo. That’s right the zoo is free and a great way to enjoy the beautiful warm Spring weather in the city!

Another site to be seen just outside the city in a suburb called St. Charles is New Town.

Take a step back to the ways city once were designed. You may think you’re in Mayberry, visiting this pocket of the New Urbanism architectural movement in the middle of a corn field.

New Town was developed by the world renown architectural firm DPZ. It brings back the traditional city planning methods of walkable cities with town centers.

This town scientifically blends various forms of residential, commercial, and municipal buildings.

Most of the properties in the town go for hefty price tags, but the architecture and town itself is pristine. I have to admit that I love this architectural movement, but the town felt a little like I walked in the movie Pleasantville.

What to eat in St. Louis? While in St. Louis we visited local restaurants that represented the melting pot that is the U.S.A., trying both an Indian Restaurant (I’ve always loved Indian food) and Nicaraguan Food (a new thing for me that I loved). Even with my restricted diet I had plenty of options at both places. They were both delicious and both restaurants are run by natives of the country their food originates from. You know it’ll be good when the recipes are things the owner’s grandmother used to make!

I hope this tour of St. Louis gives you a little insight into the sights, smells and sounds of this historic city’s blending of the old and the new. I’ll be traveling to St. Louis again this Spring and am excited to bring back and share even more great sights of the city. Have a great weekend…and start planning your trip soon!

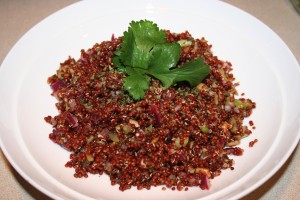
Lemony Red Quinoa

Lemony Red Quinoa

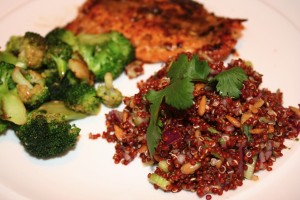
So, you saw the previous post on Quinoa and why you should add it to your diet. Here’s just one tasty recipe for Quinoa to help you introduce it into your diet. I made this last night for dinner and both Matt and I loved it! We’ve been trying to add more protein to our diets, so I’m so glad this tasty recipe hit the spot.

This one can be eaten as a side dish or as a main dish for your meal.

Ingredients:
1/4 cup pine nuts (they’re kind of expensive, so I used sunflower seeds instead)
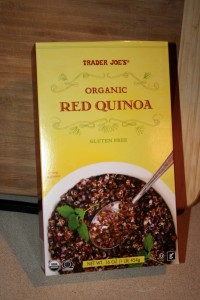
1 cup quinoa (I used red quinoa)
2 cups water
sea salt to taste
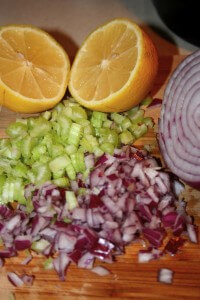
1/4 cup fresh squeezed lemon juice
2 stalks celery, chopped
1/4 a red onion, finely chopped
1/4 teaspoon cayenne pepper
1/2 ground cumin
1 bunch fresh parsley, chopped (I didn’t have a fresh parsley so I just added a little dried parsley)

Directions:
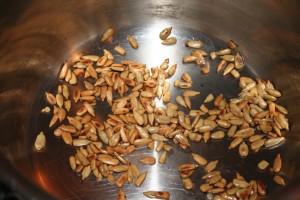
1. Toast pine nuts (or sunflowers seeds) in a pan over medium heat, stirring continually for just a minute or two. Set aside.


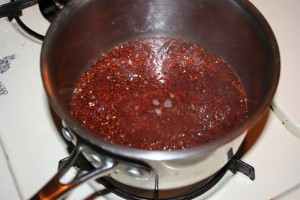
2. In a medium saucepan over medium heat add quinoa, water , and salt to taste (just a little will do) and bring water to a boil. Reduce to a simmer and cook for 10 to 15 minutes until water is absorbed (stir occasionally). Cool slightly.

3. Transfer to serving bowl. Stir in lemon juice, pine nuts (sunflower seeds), spices, celery, and onion. Serve and Enjoy!

*Recipe Source: www.allrecipes.com/Recipe/Lemony-Quinoa/Detail.aspx

Closer Look: Quinoa

Closer Look: Quinoa

Today I’m taking a Closer Look at Quinoa. Maria commented a while back that she wanted to know what to do with quinoa. So, here I’m posting why you should try quinoa and consider adding it to your diet. I’ll follow with a recipe post, so you know a tasty easy way to prepare it.

What is Quinoa?
Quinoa is technically not a grain, but is actually a seed from a plant that’s related to beets and other leafy greens. Even though its technically not a grain, its used as a substitute for almost any grain and therefore is often called a grain. Quinoa is an ancient crop that grows heartily in even poor soil or dry climates.
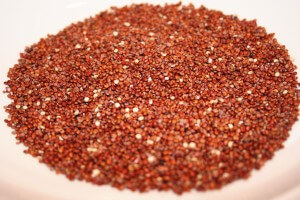
The quinoa grain itself is small, oval shaped and when cooked expands, much like rice. The grain itself is soft when cooked like rice, but the outer shell part that separates when cooked has a crunchy texture. Quinoa has various color varieties including red (shown in the photo), yellow, brown, and black.
Source: www.wisegeek.com/what-is-quinoa.htm

Why eat Quinoa?
Quinoa is a great source of protein and dietary fiber. Its rich in minerals including iron, potassium, magnesium, folate, phosphorus, zinc, copper, maganese, selenium and calcium. So, no doubt quinoa is a great addition to your diet!
Source: www.nutritiondata.self.com/facts/cereal-grains-and-pasta/10352/2

Where to buy Quinoa?
Most supermarkets carry quinoa in the rice section or with the health foods.

How to prepare Quinoa?
You can prepare quinoa much like you prepare instant rice. Follow the package directions, which most of the time say to boil 2x the amount of water as quinoa, add the quinoa and cook for 10-15 minutes. This is a pretty bland way to make it, so stay tuned for tasty quinoa recipes.

Kid Friendly Tacos

Kid Friendly Tacos

As an adult who has a fairly restricted diet, I can’t imagine being a kid or having a child that has food restriction…having to always tell your child “no” or “you can’t eat that.”
That’s why I’m launching this new segment called Kid Friendly Food, where I’ll post recipes that’ll give you more opportunities to tell your child on a restricted diet “Yes, you can have that.”

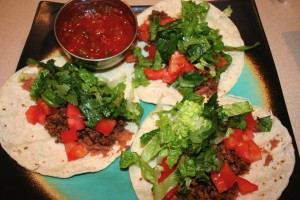
Although Matt and I eat pretty healthy, that doesn’t mean we both don’t crave junk food. In fact we passed a Taco Bell the other day and both missed those tasty tacos we once ate. So, I thought we can make those tasty tacos at home and I’ll be able to eat them. So, here are our tacos!

The taco seasoning packets you buy at the supermarket most of the time contain wheat, so Matt and I make our own seasoning in this large batch and keep it on hand, so its ready whenever we want to make tacos.
Here’s the Taco Seasoning we make:
1 tablespoon chili powder
1/4 teaspoon garlic powder
1/4 teaspoon onion powder
1/4 teaspoon crushed red pepper flakes
1/4 teaspoon dried oregano
1/2 teaspoon paprika
1 1/2 teaspoons ground cumin
1 teaspoon sea salt
1 teaspoon black pepper

My Taco Ingredients:
Ground Beef
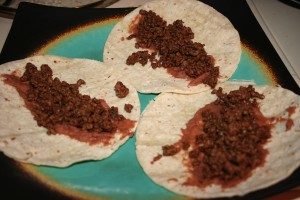
Vegetarian Re-fried beans (I like them because they add a heartiness to the tacos since I can’t eat cheese. Add them first without telling your child and see if they’ll eat them. They may not even notice.)
Chopped Tomatoes
Chopped Lettuce
Chopped Cilantro
Premade salsa
Corn Tortillas
Corn chips (to eat with tacos)

Kid Friendly Taco Directions:
1. Sautee ground beef, turkey, or chicken in a pan over medium heat, sprinkling with a little taco seasoning. Drain meat.
2. Heat corn tortillas in microwave or in a pan on stove.
3. Heat re-fried beans in pot on stove.
4. Spread a little re-fried beans on tortilla. Add meat, then tomatoes, lettuce, and chopped cilantro.
5. Serve with salsa and corn chips and enjoy!

Next time your child on a restricted diet sees a Taco Bell and like me and Matt says “that looks good” and wants tacos, you can tell them “Yes, you can have that!”
*Note: if corn is not in your diet, you can use large lettuce leaves for the tortilla. Try Boston Lettuce or Iceberg Lettuce. It may be weird at first, but you’ll get used to it.

Closer Look: Salmon

Closer Look: Salmon

Today I’m taking a Closer Look at one of my favorite proteins: Salmon. There’s so many ways to prepare it to enhance its natural flavor and it has great nutritional benefits.

Why eat salmon?
Salmon has an extremely high amount of protein. Its a great source of omega-3 fatty acids, vitamins A, E, folate, and B vitamins. Salmon is rich in minerals such as calcium, magnesium, phosphorus, potassium, and selenium. www.nutritiondata.self.com/facts/finfish-and-shellfish-products/4104/2

How to select salmon?
I buy wild caught salmon whenever possible. Even if its frozen, wild caught fish is always better than farm raised fish because the fish has been eating what it naturally eats in the wild rather than whatever the farms decide to feed the fish. Thus the nutritional value to you is much better. Look for a fillet that is dark pink or red in color. But, be careful because I’ve seen that a lot of stores carry salmon that has been dyed red to make it look better (check the label and make sure there are no dyes listed in the ingredients).

I love to experiment to find new ways to cook salmon and here’s one of the simplest, yet delicious ways to cook it.

Ingredients:
Salmon Fillets
Extra Virgin Olive Oil
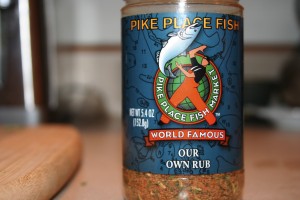
Pike Place Fish Rub (or other prepared herb rub for fish; supermarkets carry various types)
*This Pike Place Fish Rub is simply a blend of brown sugar, paprika, cilantro, garlic, pepper, onion, salt, and other spices.

Directions:
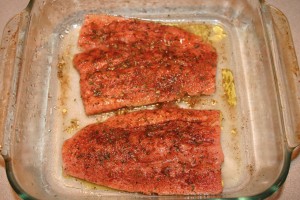
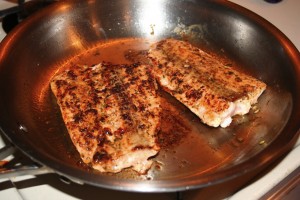
1. Rub fish fillets lightly with olive oil.
2. Sprinkle herb rub over fish fillets and pat into fillets. (Be careful if your rub contains salt not to add too much of the rub)
3. Heat some olive oil in a pan over medium heat. Add fillets and sautee until the outside of the fillet is slightly browned; flip fillet and sautee until the other side is slightly browned and center of fillet is just cooked. Serve!

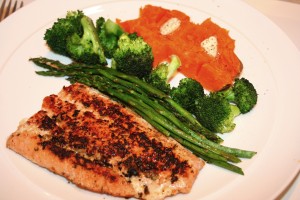
*I served my herb rubbed salmon with half a baked sweet potato with butter and oven roasted asparagus and broccoli.

Quick Valentine’s Dessert

Quick Valentine’s Dessert

Just in case you forgot, today is Valentine’s Day. So, you have no idea what sort of dessert you can have on a restricted diet or with limited time to make it…How about chocolate fondu!

Even with my restricted diet, chocolate fondu is a great no bake dessert that I can eat.

The best part about chocolate fondu for Valentine’s Day is its a fun activity that you can share with your loved one!

Here’s how I make my chocolate fondu:
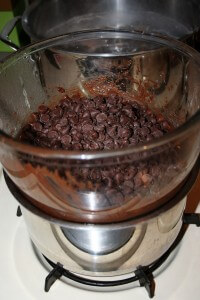
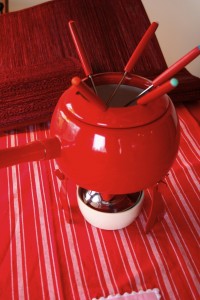
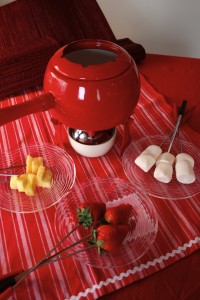
I take a package of allergen-free semi sweet chocolate chips and melt them down in a double broiler. I swirl in a little water and a touch of vanilla extract; stir thoroughly and pour into your fondu pot with a candle or sterno lighter below.

I found this cute little fondu pot at a thrift store several years ago…the red color makes it feel even more festive!

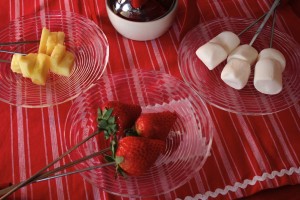
My favorite fondu dippers that follow my restricted diet:
Strawberries
Pineapple
Marshmallows
GF Animal Crackers
GF Graham Crackers
GF Pretzels
Bananas (I can’t eat em’ any more but used to be my favorite dipper)

Even with not much time to prepare and even on a restricted diet, you can enjoy this delicious dessert/activity with your loved one. Happy Valentine’s Day!

Fun Valentine’s Day Details

Fun Valentine’s Day Details

Valentine’s Day is almost here! To be honest, its kind of snuck up on me this year. I’m really not into decorating with little paper hearts or anything like that. But I do very much enjoy warm reds and pinks in my home at this point in the year when Spring just seems like it’ll never come and white and gray are the only colors outside right now.

So, here are some of my ideas to make your home feel a little warmer and cozier with the glow of Valentine’s Day, without the paper hearts. Here I’ve just pulled out little things I already have that happen to have a rosie appeal. Hope this will inspire you to pull out the decor you already have that will make your home feel a little more festive.

Above: A red bud vase (gift from my Mom) with faux queen anne’s lace flowers. I love the red and white contrast and queen anne’s lace always has an air of romance.

A beautiful red knit throw (Christmas gift from my hubby) encourages a little cozying up on the sofa when its freezing outside.

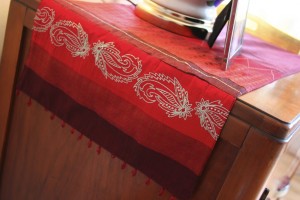
This red table runner sits on my buffet table, adding a little color with its varying shades of reds. The silver paisley embroidery adds a little ethnic flair and sheen.

The beads on the ends of the runner add a beautiful finishing detail.

Add a little romance to your home with some candle light.

I took a gold serving tray and a bunch of white candles (with varying height) and created this display on top of my buffet table. I let the wax drip as it wants, as I love the warn look it creates.

Pull out some of your cute tea cups or mugs. I found these little mugs at a garage sale in a free bin.

I love the little strawberry details (again they make a nice red against white contrast that can look festive even though they aren’t hearts).

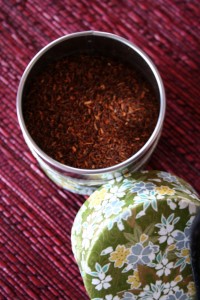
Brew some Roobios Tea for Valentine’s Day. Roobios is my favorite type of tea and its so festive as it brews tea that is red in color and full of flavor, not to mention is great for relieving chest congestion and tight lungs. You can buy various Roobios Teas at www.ourspecialtea.com/

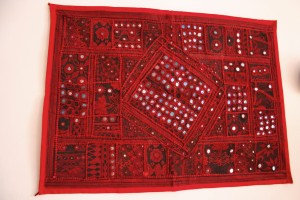
This tapestry (a gift from my sister that she brought back from India) is one of my favorite things hanging on my walls. The brilliant red hugh adds some Valentine’s Day festivity, while adding great color to my living room.

One of my favorite parts of this tapestry are the actual pieces of mirrored glass sewn into the tapestry. I love the little bits of reflection that add such life to the piece.

This beautiful calendar features vintage Parisian poster on each month’s page. Another “happy” (gift) from my sis, it brings festivity to my kitchen walls.

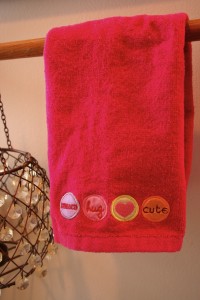
This may be one of the more traditional Valentine’s Day decor items I own. A treat from my Mom, this little towel is great to bring a little festivity to the bathroom or kitchen.
I hope these ideas will inspire you to search through your own decor items and use what you have to make your home a little warmer and more festive this Valentine’s Day!

Re-purpose It: Tiered Serving Trays

Re-purpose It: Tiered Serving Trays

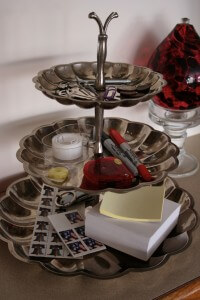
These beautiful tiered serving trays seem to always catch my eye. They’re an ode to a time long past when ladies once served mini desserts on tiers at tea parties. You certainly can still use them for that purpose, but let’s be honest…
How many times a year do you use it for that purpose?

I often find these beautiful little tiered trays at garage sales and thrift stores. I bought this particular one at a thrift store a few years ago. Honestly, I bought it not knowing what I would use it for, but I found a great everyday use for it pretty quickly.

I put the tiered serving tray on an unused are of my kitchen counter near my bar stools and my hubby, Matt, actually came up with a use for it. He started putting his keys, wallet, spare change, stamps, and check book in the tiers. I figured as long as they stay off the counter, I’m a happy camper. So, now this tiered silver serving tray acts as our catch all area. I like keeping post-its and sharpies, tape, tiny tape measures and screw drivers there as well. Its so nice to have all this stuff so easily accessible!

So, this Re-purpose It idea is a little less elegant than placing tiny cakes on the tiers, but at least it gives these tiered trays new life. You can still use them for serving your deserts, but now you have an everyday use for them as well.

My suggestion is to place the tiered tray in a spot in your home that generally collects keys, coins, etc. That way you know it will definitely get good use!

Homemade Pizza Crust You’ll Love

Homemade Pizza Crust You’ll Love

I don’t know about you, but Friday nights at my family’s house growing up was “Pizza Night!” And it was everybody’s favorite.

One of the things I hear people say when they have to go Gluten Free, with head hung low in the most sad voice I’ve ever heard is, “I can’t eat pizza anymore!”(Note: Keep reading even if you aren’t GF because this is a great recipe that’ll even give regular pizza crust a run for its money)

I’m here to tell you that despite the fact that you can’t eat Gluten, Dairy, or Eggs that you can eat Pizza! I know if you’re on a restricted diet, you’re singing “Oh, Happy Day!” You can buy premade GF pizza crust mixes and I’m sure there are some that are really tasty and I’m all for the convenience factor. But, this is one well worth making from scratch. It’s become my favorite and Matt loves it too, even though he can eat “regular pizza.”

This Quick-Bread Pizza Crust recipe is from one of my favorite Allergen Free Cookbooks.
It’s called Cooking Free, by Carol Fenster, Ph.D.

* I generally double the crust recipe. And making this pizza generally becomes not only dinner for us, but we make a night activity out of it, making the pizza then watching a movie while enjoying!

Ingredients:
1/2 cup cornstarch
1/2 cup tapioca flour (I use Bob’s Red Mill or Ener-G brand)
1 teaspoon sugar or honey
1 teaspoon xanthan gum (I use Bob’s Red Mill brand)
1/2 teaspoon salt
1/4 teaspoon potato flour, or sweet sorghum flour, or brown rice flour (I use whatever I have on hand)
1 teaspoon baking powder
1/2 teaspoon onion powder
1/2 teaspoon dried rosemary
1/2 teaspoon Italian seasoning
2 tablespoons butter or margarine
1 large egg, or 1 tablespoon egg replacer powder mixed in 3 tablespoons water
1/4 cup milk (cow, rice, soy)
Extra rice flour

*A lot of ingredients, but this one is well worth it!

Directions:
1. Preheat oven to 400 degrees. Grease 12 inch nonstick pizza pan (for a thin, crispy crust) or 11×17 inch nonstick baking pan or 10 inch cast iron skillet (for a deep-dish crust).
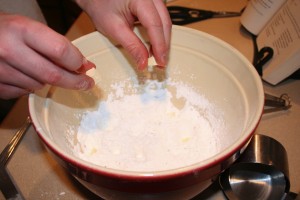
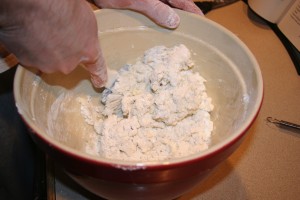
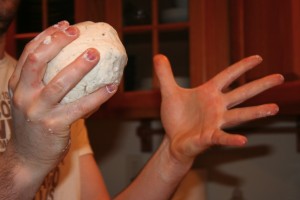
2. Combine all ingredients except egg, milk, and extra rice flour. I cut up the butter into small cubes and mix with a spatula or my hands. Bled until mixture resembles fine bread crumbs. Add egg and milk and mix until dough forms balls. Dough will be stiff, but sticky.


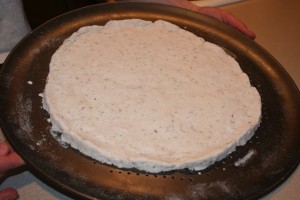
3. Place dough on prepared pan and sprinkle with extra rice flour. Pat dough to 1/4 inch thickness with hands, just up to edges of pan (sprinkling with more rice flour as needed). Make dough slightly higher around outer edge to contain toppings. Bake for 10-15 minutes. Remove from oven and top with toppings. Bake for an additional 10-15 minutes, or until browned to taste.

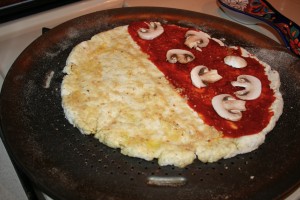
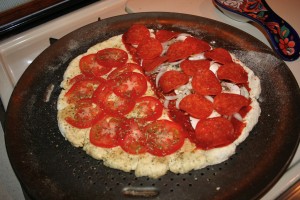
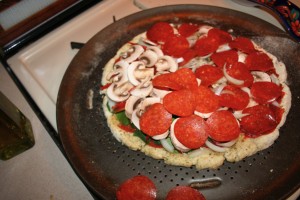
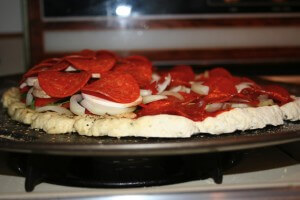
(Watch the pizza develop, the right side is Matt’s and the left side is mine)

Ideas to top the perfect Allergen Free Pizza:

First layer> Base: You have to have some sort of base for your pizza. You can use pizza sauce or use (what’s become my favorite) blend olive oil and minced garlic and spread that on as a base. (The olive oil and garlic base is perfect for those who cannot tolerate tomatoes). If you can tolerate tomatoes, add a layer of sliced tomatoes on top of the olive oil garlic blend.

Second layer> Spices and Greens: Next, I like to sprinkle on Italian seasoning or fresh basil leaves. I sometimes add spinach leaves too.

Third layer> Veggies: I then add all the veggies. There are so many different combos you can use. I use what I have in my fridge. Sliced mushrooms, onions, peppers, artichoke hearts, broccoli, whatever else you love!

Last layer> Proteins: Last, I add the proteins. If you can eat cheese that’s an obvious topping. If you’re like me and can’t do dairy you could use a replacement cheese like Diayla brand from Whole Foods. You could also use a little goat cheese (use it more sparingly than regular cheese, as it tends to be strong).
Or you can do what I do and go without cheese. This crust has a great taste that compliments pizza without cheese as the onion powder and other spices provide a lot of flavor.
As far as meats go you can add my favorite GF pepperonies (I use Boar’s Head brand), or GF Italian sausage. If you can’t do processed meats precook chicken, shred it and use it as a topping.

(As you can see above, I like a lot more toppings on my pizza than Matt does!)

This pizza is great as leftovers, heated in the toaster oven!
Hope you and your family can have your pizza night, despite any food allergies! Enjoy!
Closer Look: Asparagus

Closer Look: Asparagus

Today I’m taking a Closer Look at Asparagus. Maybe you love it, or maybe you’ve hated it in the past.
Regardless, I hope you’ll try this delicious little veggie.

Asparagus is in season in early Spring. You may be thinking that it’s far from Spring, but I’ve begun to see it pop up in the supermarkets, looking really fresh and priced really reasonably.

How do you choose the best Asparagus?
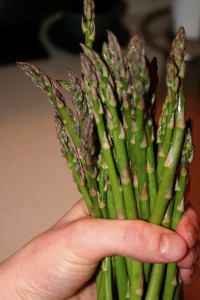
Look for thin stalks. Our American mindset generally defaults to bigger is better, but not when it comes to Asparagus. The thinner stalks have a better flavor than the thicker stalks. They should be bright green in color and should look perky and fresh, not saggy and rubbery.

What are the nutritional benefits of eating Asparagus?
Asparagus is a great source of vitamins A, C, K, and folate. Its low in carbohydrates and actually contains a significant amount of protein and fiber as well. www.nutritiondata.self.com/facts/vegetables-and-vegetable-products/2316/2

How do I cook Asparagus?
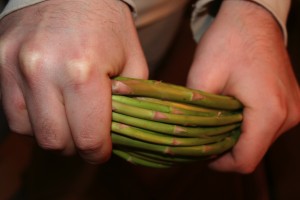
Regardless if you boil, sautee, or roast it, start by washing Asparagus in cold water. Hold the stalks with one hand on each end and bend the stalks until they break. Use the top half of the stalks and toss the lower half (I sometimes save these lower halves of the stalks and use them for Asparagus Soup; I’ll post that recipe at a later date). The point where these stalks naturally break separates the undesirable portion to eat from the naturally tasty potion.

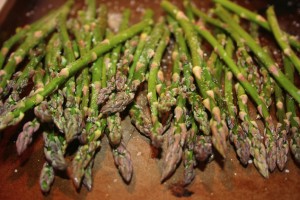
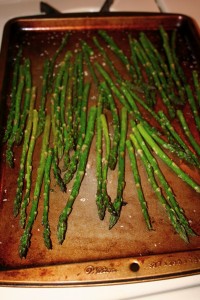
My favorite way to prepare Asparagus is to roast it in the oven. I preheat my oven to 400 degrees. I place the stalks on a cookie sheet and drizzle a little extra virgin olive oil, adding a little sea salt and pepper to taste; Toss to coat. I then spread the stalks so they’re a single layer on the pan and then roast them for 5 minutes in the oven. Cooking them at this high temperature for a short amount of time still leaves them bright green and crisp while making the tops a little crunchy.

What do I serve with Asparagus?
My favorite thing to eat with Asparagus is fish and sweet potatoes. The flavors just seem to work really well together.

Hope you’ll give this Spring veggie a try! Its become one of my favorite veggies!